텍스트 투 이미지
DiT Parasite in Autoencoder Latent Diagram — AI 이미지 프롬프트
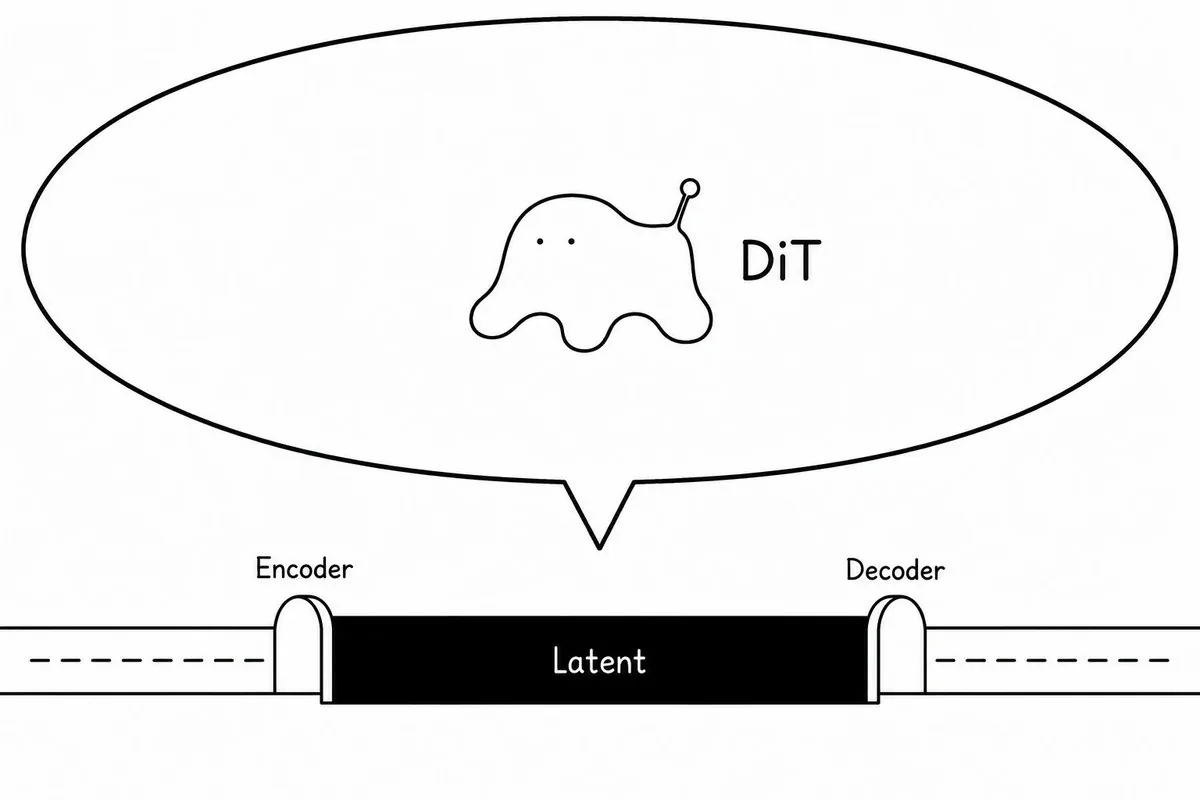
A minimalist monochrome technical cartoon diagram showing a DiT creature living inside an autoencoder latent space for use in ML articles or explainers. - AIPinMaker

프롬프트
Create a minimalist black-and-white conceptual diagram on a wide 16:9 white canvas showing a diffusion-transformer creature parasitizing an autoencoder latent space. Use thin hand-drawn black outlines and simple sans-serif labels, with a clean article-illustration style. Across the lower third, draw a horizontal pipeline: a long white tube enters from the left with a dashed centerline, passes through a small rounded arch labeled “Encoder,” then becomes a solid black rectangular central block labeled “Latent” in white, then exits through a matching rounded arch labeled “Decoder” into a white tube on the right with a dashed centerline. Above the latent block, draw one very large oval speech-bubble or callout balloon with a pointed tail aimed down toward the latent block. Inside the balloon, centered slightly left, draw exactly one small blob-like creature: soft amoeba body, two tiny dot eyes, four rounded drippy legs, and one raised antenna ending in a small circle; make it mildly uncanny but not scary and not overly cute. To the right of the creature inside the balloon, place the label “{argument name="creature label" default="DiT"}” in black. Use exactly three visible text labels on the diagram: “Encoder,” “Latent,” and “Decoder,” plus the creature label. Keep the composition sparse, monochrome, no shading, no color, no extra icons, no watermark.39:T574,Create a minimalist참고 이미지
이 AI 이미지 프롬프트 템플릿 사용 방법
 1
1프롬프트 복사 — 템플릿의 프롬프트와 네거티브 프롬프트를 가져오세요.  2
2모델 선택 — 가장 잘 맞는 추천 AI 모델을 고르세요.  3
3생성 — 클릭 한 번으로 스튜디오를 열어 결과를 만드세요.
관련 템플릿

Cloudflare Catch-All Email Routing Infographic
Goal: Create a landscape hand-drawn notebook-style Chinese infographic explaining how to register multiple ChatGPT accounts by using Cloudflare Email Routing to create catch-all mailbox aliases. Canvas: Wide 16:9 whiteboard page, clean off-white background, surrounded by a thick black dashed rounded border. Use a casual marker-and-pen sketch style with slightly imperfect lines, doodle arrows, stars, question marks, pins, and small expressive icons. Title and intro: At the top center, write the bold headline 注册 ChatGPT 第 N 个账号:用 Cloudflare 造邮箱(手绘笔记) (headline text). Underline “Cloudflare” in blue. Beneath it on the left, write the pain point line: “痛点:同个邮箱只能注册一个账号,换邮箱麻烦。” Add a small curved arrow doodle and star near the title. Main layout: Use exactly 7 main content boxes/cards plus decorative doodles. Arrange them left-to-right as a process with bold black arrows connecting sections. The 7 cards are: 1 pain card, 1 solution card, 1 core-principle card, and 4 numbered step cards. Card 1, pain card: A red outlined sticky-note box on the upper left with a sad red face icon. Text: “想注册新号?没新邮箱!” Make it look like a folded-corner note. Card 2, solution card: A blue rounded rectangle in the upper middle with a blue cloud icon. Text: “解决方案:Cloudflare Email Routing(邮箱路由)”. Put a blue arrow pointing toward the core principle box. Card 3, core principle card: A large black-outlined rounded rectangle in the upper right. Header text: “核心原理:Catch-all(通配符 / 捕获所有)”. Include a funnel icon. Show exactly 4 example incoming aliases on the left: “chatgpt@”, “netflix@”, “test1@”, and “任意前缀@”. Draw arrows from all four into a large “@” symbol and “@你的域名.com”, then a thick black arrow to a mailbox icon labeled “真实邮箱(如 Gmail)”. Bottom line with green check icon: “全部自动转发,统一汇总!无需提前创建。” Step cards along the bottom: Use exactly 4 numbered boxes. Step 1 card, bottom left: Title “第一步:准备工作”. Include exactly 3 numbered requirements: “1. Cloudflare 账号(免费注册)”, “2. 你的域名(DNS 托管在 CF)”, “3. 真实邮箱(接收转发)”. Add a globe icon, a green check mark, and a yellow key icon. Below it add small text: “域名推荐:性价比高(如 top域名)”. Step 2 card, bottom center-left: Title “第二步:启用并验证目标邮箱”. Include a small computer icon labeled “CF 控制台”. Text flow: “添加域名 → 解析 → 激活”. Draw an arrow down to a mini DNS nameserver panel with two columns: left “阿里云(修改 NS)”, right “Cloudflare(等待生效,状态:活动)”. Beneath the card, draw a red circled nameserver list with exactly 2 entries: “gene.ns.cloudflare.com” and “peyton.ns.cloudflare.com”. Add a small clock icon and text “约30分钟”. Step 3 card, bottom center-right: Title “第三步:设置邮件路由”. Show a mini Cloudflare UI mockup with exactly 2 top tabs/boxes: “Email(电子邮件)” and “Email Routing(路由)”. Include a small “Get Started” button pointing to “绑定目标地址(Destination address)”. At the bottom add an envelope icon and text: “验证邮件 → 点击确认”. Under this card place a small blue status note titled “测试转发成功” with two arrow lines showing an alias forwarding to a Gmail address. Step 4 card, bottom right: Title “第四步:设置路由规则(核心步骤)”. Show a UI panel titled “Catch-all 规则设置”. Include a blue toggle switch labeled “Active(启用)”. Include a two-row table with headers and values: row 1 “Action(操作)” to “Send to(发送至)”; row 2 “Destination(目标)” to “你的真实邮箱”. Add a red star near the corner. Final result box: At the bottom right below Step 4, add a green rounded rectangle with a smiling face icon. Text: “效果:注册时随意编造前缀(例如 chatgpt@yourdomain.com)邮件全部统一汇总到真实邮箱,实现「邮箱自由」!全程免费!” Visual style: Handwritten Chinese typography, thick black marker outlines, simple vector doodles, blue/red/green/yellow accent colors, informal classroom note-taking feel. Keep all arrows bold and directional, with minor sketchy imperfections. Constraints: Keep the entire infographic in Chinese as specified, use no photorealism, no 3D rendering, no watermark, no extra sections beyond the 7 cards and final result box, and make the text legible.3b:T12a5,Goal: Create a landscape hand-drawn notebook-style Chinese infographic explaining how to register multiple ChatGPT accounts by using Cloudflare Email Routing to create catch-all mailbox aliases. Canvas: Wide 16:9 whiteboard page, clean off-white background, surrounded by a thick black dashed rounded border. Use a casual marker-and-pen sketch style with slightly imperfect lines, doodle arrows, stars, question marks, pins, and small expressive icons. Title and intro: At the top center, write the bold headline 注册 ChatGPT 第 N 个账号:用 Cloudflare 造邮箱(手绘笔记) (headline text). Underline “Cloudflare” in blue. Beneath it on the left, write the pain point line: “痛点:同个邮箱只能注册一个账号,换邮箱麻烦。” Add a small curved arrow doodle and star near the title. Main layout: Use exactly 7 main content boxes/cards plus deco


Minimal Flat Geometry Illustration Prompt
Create a creative image of Minimal Flat Geometry Illustration Prompt. Style: photorealistic. Composition: balanced and well-framed. Lighting: natural with cinematic mood. Category: photography. Reference: minimal-flat-geometry-illustration-prompt-6532.

Flat UI/Startup Style Illustration Prompt
Create a creative image of Flat Uistartup Style Illustration Prompt. Style: photorealistic. Composition: balanced and well-framed. Lighting: natural with cinematic mood. Category: photography. Reference: flat-uistartup-style-illustration-prompt-12631.

Minimalist Typographic Illustration Conveying Meaning
Create a creative image of Minimalist Typographic Illustration Conveying Meaning. Style: photorealistic. Composition: balanced and well-framed. Lighting: natural with cinematic mood. Category: photography. Reference: minimalist-typographic-illustration-conveying-meaning-5241.

Japanese LP Psychology 8-Step Infographic
{"type":"Japanese marketing infographic","topic":"high-converting landing page structure guided by user psychology","style":{"look":"clean flat business infographic","palette":{"primary":"blue","secondary":"green","neutral":"white and light gray","accent":"dark navy headline with one highlighted blue numeral"},"background":"plain white","lines":"thin gray connectors and borders","icons":"simple circular line icons in blue and green","aspect_ratio":"16:9 landscape"},"headline":{"text":"CVRの高いLPは{argument name=\"number of elements\" default=\"8\"}要素で心理を前に進める","position":"top center","emphasis":"the numeral is large and bright blue"},"layout":{"columns":3,"sections":[{"title":"ユーザー心理","position":"left column","count":8,"items":[{"index":1,"icon":"eye","label":"何のサービスか気になる","subtext":"まずは目に留まり、注意が向く"},{"index":2,"icon":"magnifying glass","label":"もっと知りたいと思う","subtext":"興味を持ち、内容を読み進める"},{"index":3,"icon":"thought cloud","label":"自分ごととしてイメージする","subtext":"利用シーンを想像し、自分に関係があると感じる"},{"index":4,"icon":"heart","label":"欲しい・解決したいと思う","subtext":"メリットを感じ、欲求が高まる"},{"index":5,"icon":"balance scale","label":"他と比べて良さそうだと思う","subtext":"比較して、優位性や違いを理解する"},{"index":6,"icon":"check mark badge","label":"信頼できると感じて納得する","subtext":"根拠や実績を確認し、安心して決められる"},{"index":7,"icon":"running person","label":"今すぐ行動しようと思う","subtext":"迷いがなくなり、行動に移る"},{"index":8,"icon":"smiling face","label":"使ってよかったと感じる","subtext":"成果を実感し、満足・信頼が深まる"}]},{"title":"LP全体構成(ワイヤーフレーム)","position":"center column","count":8,"items":[{"index":1,"label":"Attention(注意)","wireframe":"logo at top, main hero block with headline and CTA button","text":"キャッチコピーで課題や価値を一言で伝える"},{"index":2,"label":"Interest(興味)","wireframe":"image placeholder and text block","text":"サービス・商品の特徴や課題の解決方法を紹介"},{"index":3,"label":"Image(想像)","wireframe":"wide image placeholder","text":"利用シーン・導入後の未来をイメージできる構成"},{"index":4,"label":"Desire(欲求)","wireframe":"three small circular icons and text","text":"得られるベネフィット/価値を提示し『欲しい』と思わせる"},{"index":5,"label":"Comparison(比較)","wireframe":"comparison table grid","text":"他社・代替手段との違いや優位性を明確にする"},{"index":6,"label":"Consent(納得)","wireframe":"star rating, avatar, testimonial lines","text":"実績・お客様の声・データで信頼性を補強し、納得を促す"},{"index":7,"label":"Action(行動)","wireframe":"large CTA area with dark button","text":"今すぐ始める/無料で試すなど行動を後押しするCTA"},{"index":8,"label":"Satisfaction(満足)","wireframe":"circular arrow support icon and text","text":"導入後のサポート・保証・返金制度など安心材料で満足・リピートにつなげる"}],"extra_labels":["LOGO","CTAボタン","今すぐ申し込む"]},{"title":"役割","position":"right column","count":8,"items":[{"index":1,"icon":"megaphone","text":"注意を引き、スクロールを促す導入パート"},{"index":2,"icon":"open book","text":"興味を持たせ、読み進める動機をつくるパート"},{"index":3,"icon":"picture frame","text":"自分ごと化を促し、利用イメージを具体化するパート"},{"index":4,"icon":"heart","text":"ベネフィットを訴求し、『欲しい』を引き出すパート"},{"index":5,"icon":"balance scale","text":"比較によって、選ぶ理由を明確にするパート"},{"index":6,"icon":"shield","text":"信頼・安心を提供し、意思決定のハードルを下げるパート"},{"index":7,"icon":"cursor arrow","text":"行動を後押しし、コンバージョンを生むパート"},{"index":8,"icon":"smile face","text":"満足・信頼を高め、継続・紹介につなげるパート"}]}],"connectors":"dotted horizontal guide lines connect each of the 8 center stages to matching items in the left and right columns; small downward arrows connect stacked cards in the left column"},"footer":{"style":"rounded rectangular note bar with light background and thin blue outline","icon":"light bulb","text":"ユーザーの心理を段階的に前へ進めることで、自然な流れでCVRを最大化できます。"},"composition":"top headline, three evenly spaced vertical columns beneath it, eight aligned horizontal rows across the page, symmetrical educational slide design for a landing page optimization manual","quality":"sharp vector text, presentation-slide clarity, polished corporate training material"}3d:T1407,{"type":"Japanese marketing infographic","topic":"high-converting landing page structure guided by user psychology","style":{"look":"clean flat business infographic","palette":{"primary":"blue","secondary":"green","neutral":"white and light gray","accent":"dark navy headline with one highlighted blue numeral"},"background":"plain white","lines":"thin gray connectors and borders","icons":"simple circular line icons in blue and green","aspect_ratio":"16:9 landscape"},"headline":{"text":"CVRの高いLPは{argument name=\"number of elements\" default=\"8\"}要素で心理を前に進める","position":"top center","emphasis":"the numeral is large and bright blue"},"layout":{"columns":3,"sections":[{"title":"ユーザー心理","position":"left column","count":8,"items":[{"index":1,"icon":"eye","label":"何のサービスか気になる","subtext":"まずは目に留まり、注意が向く"},{"index":2,"icon":"magnifying glass","label":"もっと知りたいと思う","subtext":"興味を持ち、内容を読み進める"},{"index":3,"icon":"thought cloud","label":"自分ごととしてイメージする","subtext":"利用シーンを想像し、自分に関係があると感じる"},{"index":4,"icon":"heart","label":"欲しい・解決したいと思う","subtext":"メリットを感じ、欲求が高まる"},{"index":5,"icon":"balance scale","label":"他と比べて良さそうだと思う","subtext":"比較して、優位性や違いを理解する"},{"index":6,"icon":"check mark badge","label":"信頼できると感じて納得する","subtext":"根拠や実績を確認し、安心して決められる"},{"index":7,"icon":"running person","label":"今すぐ行動しようと思う","subtext":"迷いがなくなり、行動に移る"},{"index":8,"icon":"smiling face","label":"使ってよかったと感じる","subtext":"成果を実感し、
더 많은 프롬프트 탐색
카테고리별 AI 이미지·영상 프롬프트를 더 찾아보세요.